You can build an ecommerce storefront around Whop without writing your own payment form. Use the Whop CLI to configure what you sell and its price, generate a Whop checkout, then connect that checkout to the product page customers browse.
This guide follows a small example: a natural-color canvas tote, priced at $28, with 20 units available. The product, stock, and price are illustrative. We will keep the first purchase flow to one variant, then explain where embedded checkout and a larger cart fit.
Disclosure: Dennis Hegstad works at Whop. AdsX may earn compensation from qualifying Whop referrals through our partner link. We reviewed public sources and inspected the help and schemas in @whop/cli 0.25.0 on October 8, 2026. We did not create a merchant store, process a payment, or test fulfillment for this article.
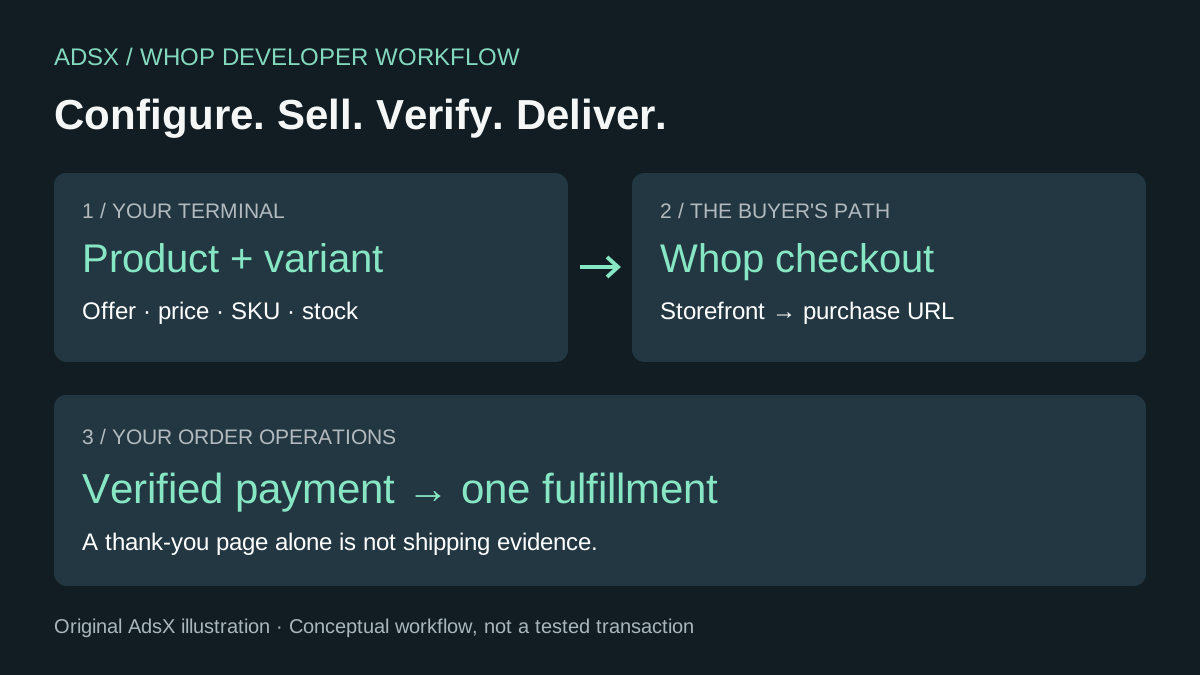
Original AdsX storefront-to-fulfillment illustration.
What you are connecting
The storefront explains the offer. Whop holds the purchasable configuration and runs checkout. Your operating process makes sure a paid order becomes the correct shipment.
| Part | Job in this example |
|---|---|
| Business account | Owns the product and payment configuration |
| Product | Describes the canvas tote and collects a shipping address |
| Variant | Identifies the natural tote, its $28 price, and its stock |
| Checkout configuration | Provides the purchase URL for that variant |
| Storefront | Shows the offer and sends the buyer to checkout |
| Fulfillment process | Verifies payment, picks the tote, and records dispatch |
The CLI calls Whop's API for you. A successful resource-creation command does not prove the customer can complete the entire buying journey.
Version detail: CLI 0.25.0 reports API version 2026-10-07-2. It exposes variants as the current purchasable-resource command group and labels plans as deprecated compatibility endpoints. Checkout still uses --plan_id for the variant's plan_ identifier. That naming overlap is real; it is not a reason to invent a --variant_id flag. See the official CLI package and inspect the installed help before adapting older examples.
1. Install the CLI and select the business
You need a Whop business you control, permission to manage its commerce resources, and Node.js 22 or later for the npm installation. This article pins the version whose command definitions we checked:
npm install -g @whop/cli@0.25.0
whop --version
whop login --method oauth
whop auth account --list
Choose the intended business from that list. Replace the placeholder below with its real ID:
whop auth account biz_REPLACE_WITH_YOUR_ACCOUNT
whop products list --format json
The CLI overview documents installation and authentication. It also states that the CLI has no sandbox, test, or dry-run mode. Treat the creation commands below as production writes. A local development server or a preview build does not make its payment links test checkouts.
If you use an API key instead of browser login, keep it in server-side configuration or your approved credential manager. An existing WHOP_API_KEY can override the saved profile for API commands, according to the official CLI authentication reference. Resolve that scope before creating anything. Never paste a secret into the storefront component.
2. Create the product
Write the real offer before entering commands: material, dimensions, included quantity, delivery area, dispatch promise, returns information, and a support route. For our example, the command creates the descriptive product and enables shipping-address collection:
whop products create \
  --account_id biz_REPLACE_WITH_YOUR_ACCOUNT \
  --title "Canvas Tote" \
  --description "One natural canvas tote. Review dimensions and delivery terms before ordering." \
  --collect_shipping_address true \
  --visibility visible \
  --format json
This creates a customer-visible product configuration. Use accurate final details when you run it. Save the returned prod_ ID; the next command attaches pricing and inventory to that product.
The product API reference documents product creation and address collection. Collecting an address does not select a carrier, establish shipping rates, or guarantee that every destination is serviceable. Resolve those details in your business configuration and verify the resulting checkout before promoting the store.
Add real product photography to the gallery through your supported dashboard or file-upload workflow. The explanatory diagram in this article is not a substitute for showing a customer the item they will receive.
3. Add a priced variant and finite stock
In this CLI version, the variant holds the purchase terms. Inspect its current schema if your installed version differs:
whop variants create --help
whop variants create --schema --format json
Create the example natural-color variant using the product ID you just received:
whop variants create \
  --account_id biz_REPLACE_WITH_YOUR_ACCOUNT \
  --product_id prod_REPLACE_WITH_CREATED_PRODUCT \
  --title "Natural" \
  --attributes '{"color":"Natural"}' \
  --sku "TOTE-NAT" \
  --plan_type one_time \
  --initial_price 28 \
  --currency usd \
  --unlimited_stock false \
  --stock 20 \
  --visibility visible \
  --format json
28 represents $28 in the chosen currency, not 28 cents. Save the returned variant identifier, which retains the plan_ prefix. If you add a black tote later, create a distinct variant with the same attribute name, color, and a different value. Keep your own SKU mapping consistent; the CLI schema does not promise SKU uniqueness.
Finite stock needs the explicit --unlimited_stock false setting because the schema says stock is ignored when unlimited stock is enabled. Check the saved configuration and customer behavior rather than treating the command alone as an overselling test. Our variant and inventory guide covers the wider merchant checks.
If a create request times out: inspect the account before repeating it. For scripted creation, use a fresh --idempotency-key for each distinct operation and retain it for an exact retry. Whop's idempotency documentation describes a 24-hour retention window. Reusing the key after that window is not duplicate protection. Do not generate a new key just because the first response was ambiguous.
4. Generate the Whop checkout
Use the saved variant ID to create a payment-mode checkout configuration:
whop checkout-configurations create \
  --account_id biz_REPLACE_WITH_YOUR_ACCOUNT \
  --plan_id plan_REPLACE_WITH_CREATED_VARIANT \
  --mode payment \
  --metadata '{"source":"tote-storefront","catalog_sku":"TOTE-NAT"}' \
  --format json
Copy the returned purchase_url exactly. The checkout-configuration reference identifies that field as the customer purchase URL. Do not construct it from an assumed URL pattern or confuse it with the ch_ configuration ID.
This example deliberately uses reusable catalog metadata. It does not put one fixed order_id on a checkout link that many customers will use. If you later create a checkout for each order, create the pending order on your server, associate that order's own ID, and validate the association when processing payment events.
The merchant's checkout URL is also different from AdsX's Whop partner signup link. Use the generated checkout to sell your product. Do not insert our referral code into your customers' checkout configuration.
5. Put the offer on a storefront
For a first version, a product page and a buy button are enough to connect this flow. Here is an original React component you can render from your site's existing home or product route:
export function ToteOffer({ checkoutUrl }: { checkoutUrl: string }) {
  return (
    <main>
      <h1>Canvas Tote — Natural</h1>
      <p>One tote. Add your real dimensions, materials, and care details.</p>
      <p>Item price: $28 USD. Review the final total at checkout.</p>
      <p>Add your actual delivery area, dispatch timing, and returns link.</p>
      <a href={checkoutUrl}>Buy the natural tote on Whop</a>
    </main>
  );
}
Supply checkoutUrl from the exact returned purchase_url. Replace the instructional copy and add an accurate product image before publishing. The displayed price is merchandising copy; Whop's configured purchase terms determine the checkout amount. Keep both in sync when pricing changes.
You can use an existing website. If you want Whop-hosted application infrastructure, the official CLI repository documents the scaffold and deployment workflow. In an empty working directory, choose an available route you own:
whop apps init \
  --app_type website \
  --name "Tote Store" \
  --route REPLACE_WITH_YOUR_UNIQUE_ROUTE \
  --dir ./tote-store \
  --company_id biz_REPLACE_WITH_YOUR_ACCOUNT

cd tote-store
whop apps dev
apps init registers an app and scaffolds the project; it is not merely a local folder generator. Render the component through the generated site's route, keeping the scaffold's routing and build configuration intact. The app initializer uses --company_id even though the commerce examples use --account_id; check each command's help rather than renaming flags for consistency.
After editing, stop the development server and create a build without promoting it:
whop apps deploy --preview
Review the build result and available review path. When the site and purchase flow are ready, whop apps deploy builds and promotes production. Use the actual hosted URL returned by Whop. Confirm your account's hosting and payment terms; this guide does not claim that deployment or payment processing is free.
6. Decide whether you need embedded checkout
A hosted checkout link keeps the first implementation small. An embedded checkout is useful when the purchase should remain within the storefront's layout or when you need a richer cart.
The current Whop Elements checkout documentation describes a single plan, an items array, or a checkoutConfiguration. Its multi-item flow requires the same seller and compatible billing terms. It also says purchase inputs are set when checkout is created: changing the cart requires a new checkout, rather than updating an existing purchase underneath the buyer.
Choose one flow and complete it before adding the other. For a larger store, use the multi-product checkout test plan to verify variant selections, quantities, discounts, final totals, and partial refunds. The one-variant CLI example above does not establish those results.
7. Connect payment confirmation to fulfillment
A customer visiting a thank-you URL is not proof that you should ship a tote. Whop's Elements guide explicitly directs fulfillment through webhooks rather than a browser completion callback. A shopper can close the tab, and a redirect can follow an unsuccessful payment attempt.
For an automated integration, use a verified webhook endpoint and durable order storage. Whop's checkout integration walkthrough explains server-side confirmation and signed webhook handling; reconcile its examples with your current API and CLI version before reuse.
Your application should verify the webhook signature, connect the payment to the intended business and purchase, and record a fulfillment job once. Keep duplicate-delivery handling and the order transition in durable storage. Make the downstream shipment operation safe to retry too. A process restart must not erase the record of an already handled payment.
For a small manual launch, name the person who checks the authoritative payment/order record and releases each shipment. They still need a reliable way to avoid dispatching twice. Whichever workflow you choose, a paid order and a shipped order are separate states.
Launch with evidence from the complete flow
Use this acceptance table before inviting customers:
| Check | Evidence to record |
|---|---|
| Correct business | Product, variant, and checkout belong to the intended account |
| Correct item | Natural tote and its SKU remain identifiable through the purchase |
| Correct amount | $28 item price, currency, and applicable additional amounts are clear |
| Delivery | Usable address, supported destination, and an achievable dispatch promise |
| Stock | Saved finite quantity and observed behavior when availability changes |
| Payment outcome | A verified successful payment releases one fulfillment job |
| Exceptions | Failed or abandoned payment does not ship; duplicate delivery does not ship twice |
| Customer experience | Phone layout, support, returns information, and final confirmation are understandable |
Read-only checks can establish configuration and layout. Payment and fulfillment claims need a payment-testing method explicitly supported for your exact integration, or a deliberately authorized live transaction with understood costs. Do not use a test card against the production CLI flow simply because another tutorial mentions one.
The first milestone is a dependable path from product selection to the correct delivery. Expand the catalog after that path is working. If you need the dashboard-first route, start with our Whop checkout-link guide. If Whop fits the store you want to build, create your business through AdsX's Whop partner link, then work through one offer before adding more.